A Python Controlled Moon Phase Lamp Powered by Raspberry Pi
Pushing the limits of the Pi Zero, 16 NeoPixels, and 500 folded paper triangles
My moon phase lamp is the follow-up to the sunrise lamp I created to convince our son that the day does not start at 5am.
With this new model I wanted to make some improvements and break out of my coding comfort zone as I know I’ve picked up some quirky hack-it-together programming habits. I also wanted to discover more about the limits of the Pi when it comes to powering NeoPixel LEDs.
The moon lamp is similar in design to my sun: it is a snapology origami sphere, has a NeoPixel ring for a light and is driven by a Raspberry Pi Zero. It also has the same variety of light programs including a gentle sunrise for the morning, and a drifting off program which dips from blue and settles at a low level as a night light.
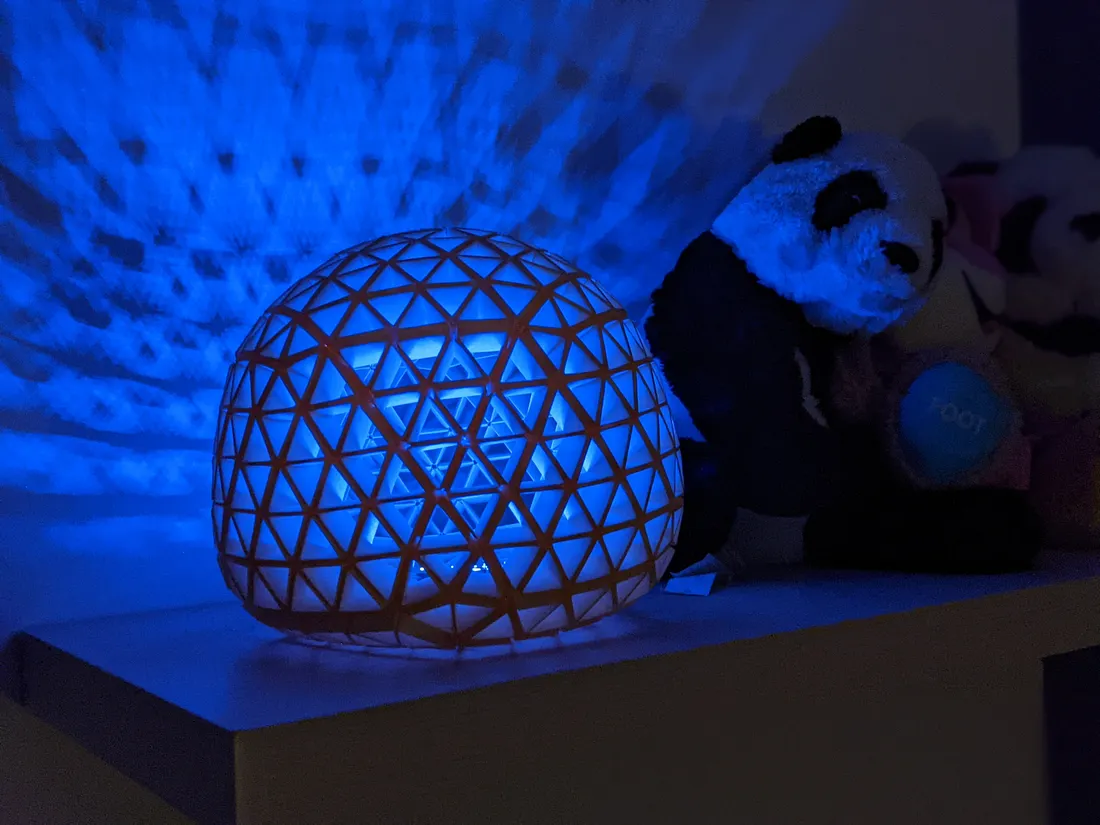
Once again, the spherical shape comes from dividing the 20 triangular faces of an icosahedron into smaller triangles — in this case 25 of them. The moon has 500 triangles in total compared to 320 in the sun. I was aiming for the same overall size as the sunrise lamp so I made the moon triangles slightly smaller. I guess you could say this lamp has a higher resolution!
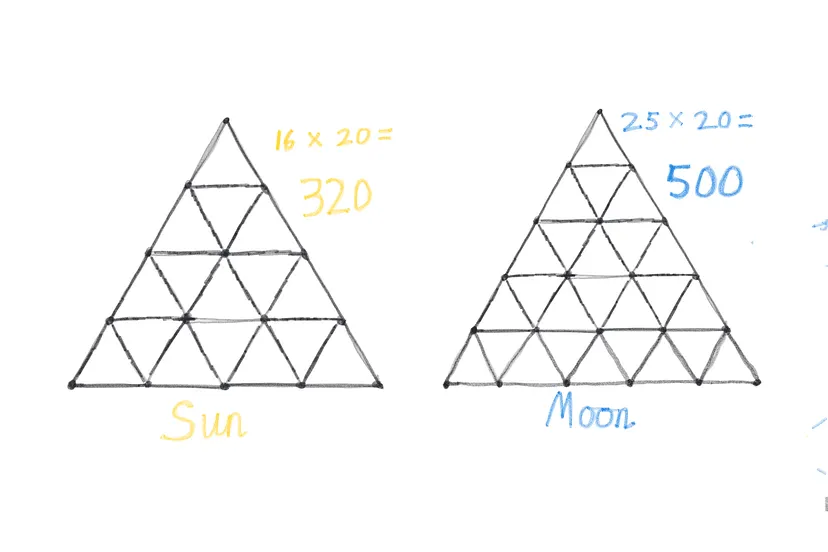
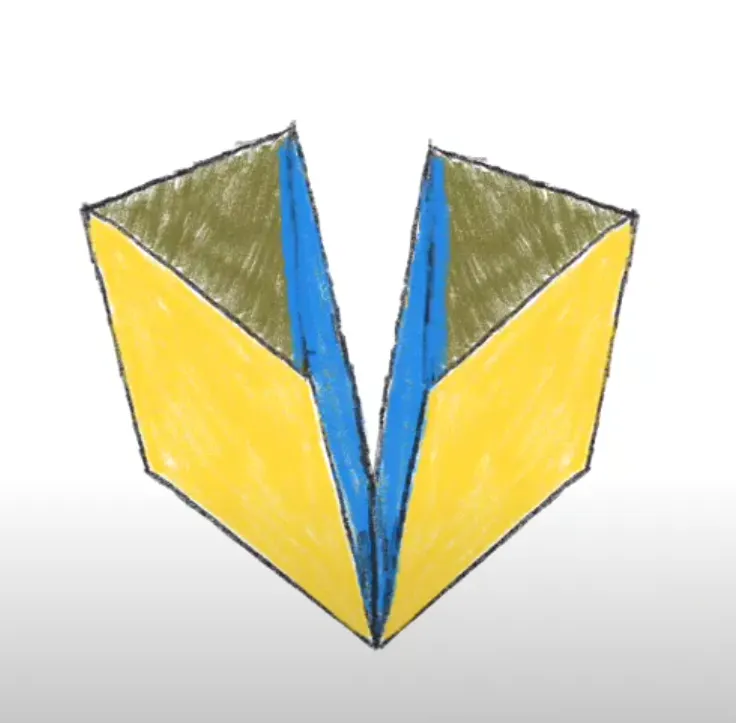
I go into more detail about snapology in my sunrise lamp video , so check it out if you want to know more about this form of origami and to see further examples. In short though, rectangles are folded to create polygons, which in turn are ‘snapped’ together using paper connectors. No glue or other adhesives are required.
When it came to programming the first lamp, my learning was stunted by the fact that everything worked first time. I followed Adafruit’s installation guide and Micro Python tutorials expecting to run into problems, but just didn’t. Nothing blew up when I ignored Adafruit’s plea to place a capacitor between the positive and negative terminals. Nothing faded due to insufficient power. The RGB values were not reversed so I didn’t need to wrench through the sample code: red was red, green was green, blue was blue. My lucky stab at coding it using my usual web-based IDE didn’t fail and my first adventure in Crontab succeeded. Everything went well. Bummer!
Powering the NeoPixels
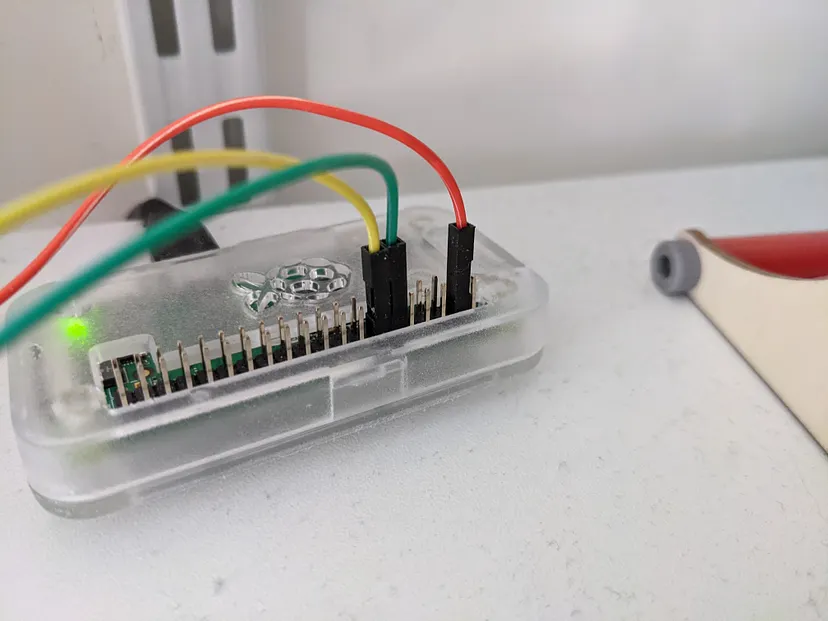
My first learning barrier concerned powering the NeoPixels from the Pi. Just about every other application I came across used a separate power supply. I found several useful videos showing whacking great power supplies which had to be hidden in cupboards but it seemed rare to find projects where the NeoPixels were powered directly from the 5v pin on the Pi. Amongst other very precise technical information on the Pi Hut website, was this general cautionary note:
“… only power a few NeoPixels through the Raspberry Pi.”
But how many is a few? And what happens at the point you add NeoPixels beyond that mystery limit? Is a gradual dimming the only consequence? Or is the result more exciting like a Raspberry Pi explosion?
My knowledge and understanding of electricity is still very much based on what I learnt at school: there’s a triangle to show the relationship between all the elements needed. So we need fuel, heat and oxygen, and to find the electrical current we divide fuel by oxygen and the more fire, the wider the river and the greater the pressure of the electrons! Is that right? It isn’t it’s it?
I dug a bit deeper.
From Raspi.tv I learned that the Raspberry Pi Zero would draw around 300mA at most, and Kevin’s helpful video demonstrated a good process for following schematics to find information about current draw limitations. Most models of Raspberry Pi have a polyfuse which will blow at around 2.5 amps. However, any such fuse is absent from the Pi Zero and so the 5v pin is connected directly to the power source. No fuse! Well in my head then, why not connect the aforementioned whacking great power supply directly to the Pi?
I was still not entirely sure why this would be a problem, but in trying to find what the best interpretation of “a few NeoPixels” was, my query on Stack Overflow returned two pearls of wisdom:
“Why are you even thinking of using the Pi as a power supply? … the RPi will act as an expensive fuse.”
and:
“The Pi Zero has a direct connection between the power and headers. If you overload it sufficiently you will burn out the board tracks.”
So it’s about heat then! And not wanting my paper moon to turn into a flaming meteorite I thought I ought maintain a margin of safety. So, I decided ‘a few’ could mean 16 NeoPixel LEDS, but not 24, or 60.
I managed to solder and connect the NeoPixel ring with improved precision, but also managed to burn a hole in our vinyl table cloth too!
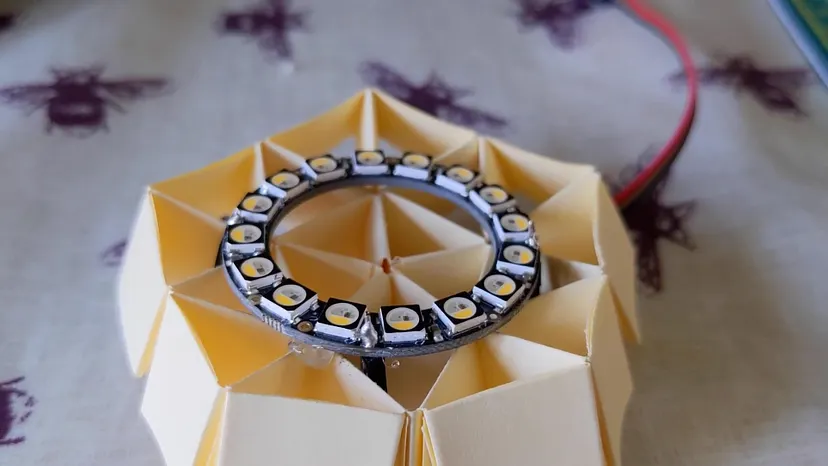
Adafruit’s Uberguide suggests that each NeoPixel requires a maximum of 60mA, so my ring of 16 should draw a total of 960mA or just under one amp. This theoretical figure was close to the reading I got from a USB power meter.
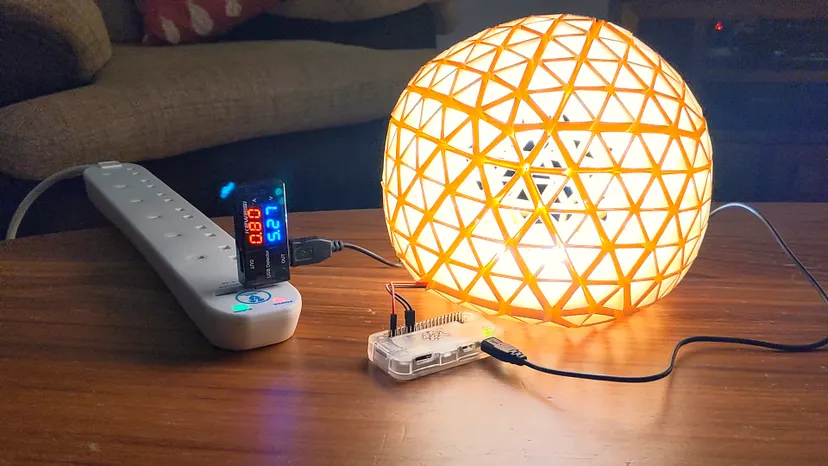
Controlling the lamp from a browser
My next learning barrier concerned controlling the lamp without big delays between a program being selected and it running.
The controls for my sunrise lamp are contained in a form hidden on my personal website. When a program is selected a PHP file writes its name into a JSON file, e.g. {"program":"morning"}. A Python script checks this JSON file once a minute through crontab on the Raspberry Pi to see if a request to change the light program had been made.
It works, but is not ideal. It’s like having my toaster repeatedly ask me if I want toast until I say yes. If I want toast, I’ll let my toaster know!
With the Arduino projects I’d seen, there seemed to be a range of off-the-shelf programs to choose from but I wanted to stay with the Pi for now. I knew a web server would be needed and I wondered whether Lighttpd would serve the purpose as it’s apparently used to control those epic Halloween light displays.
An erstwhile foe
I began following Nasmus Nasir’s tutorial for installing Lighttpd with PHP and Python but it wasn’t long before I came across an old foe: file permissions. The install failed, but as failures go it was fairly silent and it wasn’t until I gave up and switched to an Apache install that I was forced to accept that I needed to get my head around CHMOD. So, having read The Dummies guide to file permissions, I decided to stick with the Apache set up and was soon connecting directly to the lamp.
The next challenge was running the Python script from the browser. I was expecting this to be far more complicated and that I might need to get my head around some whole new framework like Flask. However, it was achievable with just one line in PHP:
system("sudo python3 pulse.py");The only sticking point was due to many of my light programs running within a while True loop. The initial result was a web page that never seemed to load completely after a button press. However, I soon learnt that the script could run in the background by passing in some arguments:
system("sudo python3 pulse.py myargs /dev/null/ 2>&1");I was also forced to address the feedback I’d received about my previous clunky use of WGET to transfer files from my personal website to the Pi. Editing a Python file in a web-based IDE and transferring it over was one thing, but of course PHP is a different thing altogether with only the output sent; no logic is transferred via WGET. I read through the Secure Copy page on the Raspberry Pi website and then slipped into a far better process of editing my code with Sublime on my Pixelbook. I was finally using SCP to transfer files to the Pi.
I don’t know how much of a hack this all is, and whether I need to properly explore Flask or similar as a next step, but in terms of running a simple Python file from a browser my process worked fine. I notice from tutorials that with Flask the LED comes on almost instantly, but with my approach there is a short (but very tolerable) delay. I suspect this delay is to do with the fact that my programs start by killing existing Python processes:
1import os2import psutil3
4# Killing existing Python processes to prevent conflicting animations5def killAllButParent():6    for proc in psutil.process_iter():7        pinfo = proc.as_dict(attrs=['pid', 'name'])8        procname = str(pinfo['name'])9        procpid = str(pinfo['pid'])10        if "python" in procname and procpid != str(os.getpid()):11            print("Stopped Python Process ", proc)12            proc.kill()
Using Visual Crossing to establish moon phase information
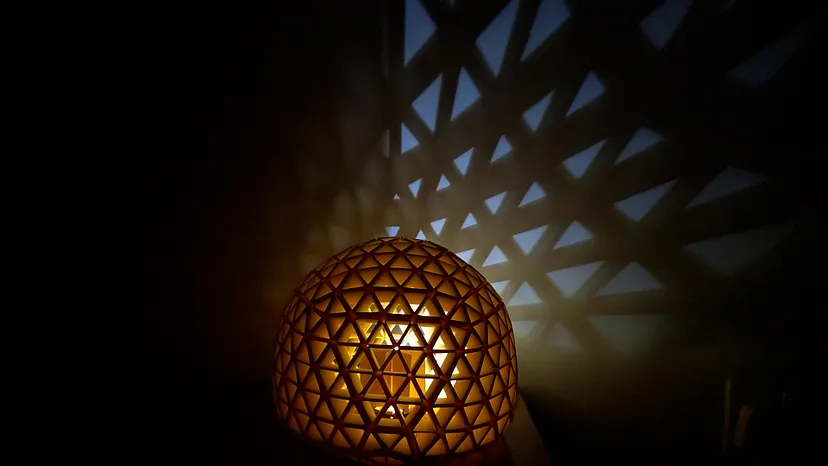
I was hoping that the moon phases would display in a more striking fashion using the simple divider below, but so much light was bounced around even during a crescent moon that the effect was essentially lost. However, it was still a useful learning process to go through.

For the moon phase information I came across Visual Crossing, a service which provides all kinds of APIs for Weather and Astronomical information. Once signed up for a free account I was able to make use of their moon phase numbering system.
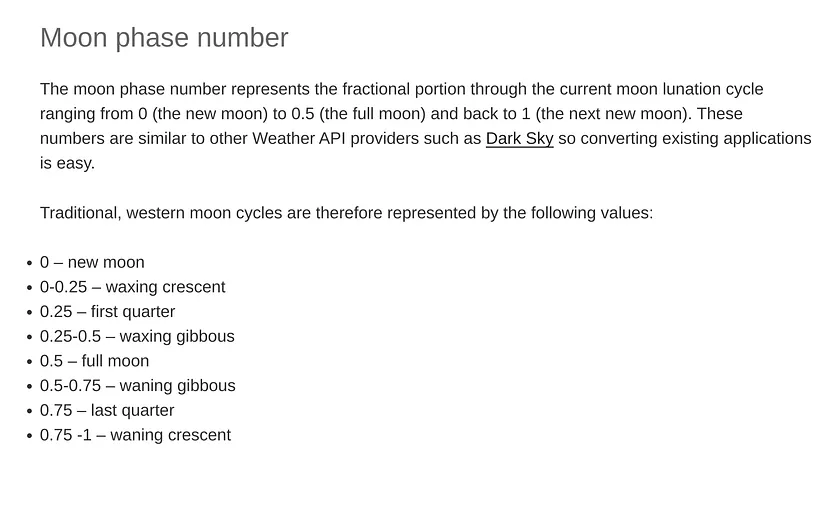
The API returns a JSON file. A Python script then extracts the moon phase value and uses this to turn on the appropriate LEDs:
1import json2from urllib.request import urlopen3
4# Get the moonphase info from Visual Crossing API5url = "https://weather.visualcrossing.com/VisualCrossingWebServices/rest/services/timeline/Cirencester/today?key=YOUR_API_KEY&include=current"6response = urlopen(url)7data_json = json.loads(response.read())8moon_phase = data_json["currentConditions"]["moonphase"]
This is definitely a service I will return to in the future as it was certainly easy to use.
Conclusion
As far as snapology origami goes, I’m not convinced having smaller but more numerous triangles made for a better lamp as it struggles to keep its spherical shape. Otherwise though, it works well as a morning lamp. And as for software I think exploring Flask or MQTT will be my next step.