Add Font Awesome Icons to Your NextJS App Router Project
Speak Less, Icon More

Why Font Awesome?
Font Awesome is a popular icon library that provides a vast collection of scalable vector icons. These icons are perfect for enhancing the user interface of your Next.js application by adding visual clarity and improving user experience. Font Awesome icons are lightweight and can be easily customized to match your application’s design.
Adding Font Awesome with App Router
When using the App Router in Next.js, you should add the Font Awesome styles to your layout.js file instead of _document.js. This is because layout.js wraps all your application pages, ensuring that the icons are available throughout your app. Including them in _document.js might lead to unnecessary styles being loaded on pages that don't require them.
Installation
Once you have set up your App Router Next.js project, there are a couple of node packages to install:
1npm i --save @fortawesome/react-fontawesome@latest @fortawesome/free-solid-svg-icons @fortawesome/fontawesome-svg-coreNow write the following code at the top of the layout.js component of the route where you want to use Font Awesome:
1import "@fortawesome/fontawesome-svg-core/styles.css";2import { config } from "@fortawesome/fontawesome-svg-core";3config.autoAddCss = false;This snippet in the layout.js file fine-tunes how Font Awesome icons integrate with your Next.js project using the App Router:
- It starts by grabbing the core CSS styles needed for the icons.
- Next, it imports a configuration object to tweak Font Awesome's behaviour.
- Finally, it sets the
autoAddCssproperty tofalse. This disables the automatic injection of CSS styles by Font Awesome. By doing this, you have more control over when the styles are loaded, ensuring they're only included in yourlayout.jsfor pages that actually use icons. This keeps your project leaner and avoids unnecessary style loading.
Adding an icon to a component
This approach lets you send only the icons your user actually needs, minimizing the overall size of the data you transmit. You now just need to select icons from the Font Awesome website :

To use an icon, you include the following code in the component to indicate which icons you wish to use:
1import { FontAwesomeIcon } from "@fortawesome/react-fontawesome";2import { faHouse } from "@fortawesome/free-solid-svg-icons";Then within the JSX reference the icon using the code copied from the Font Awesome website. This can be combined with styles, Tailwind CSS for example, as shown in my below Header.js component:
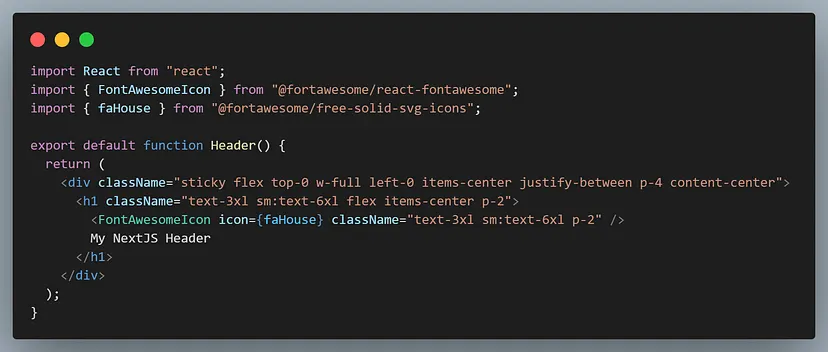
And here is the resulting page when the Header.js is imported:
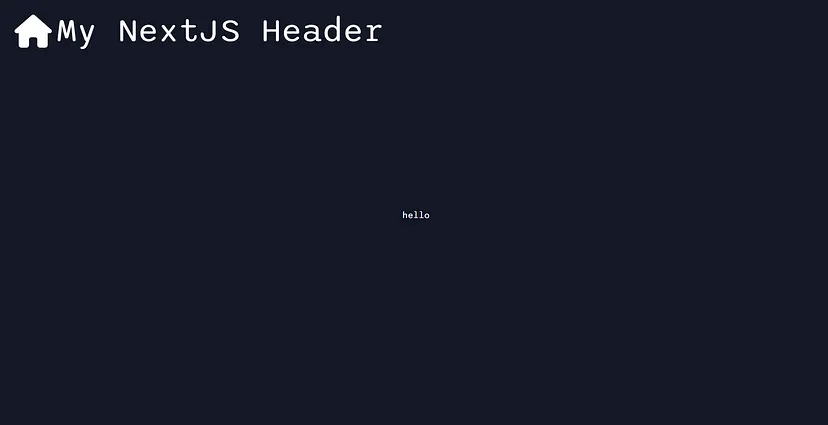
Big and ugly for now, but by strategically including styles in your layout and selectively importing icons, you ensure a visually appealing user experience while maintaining a performant and streamlined codebase. With this approach, your Next.js application leverages the power of Font Awesome to effectively communicate information and elevate the overall user journey.
Font Awesome React Documentation
Explore tree-shaking, icon sizing, transformations, and layers