Building a Raspberry Pi 5 Family Location Tracker with Node-RED, Mosquitto, and OwnTracks
A journey into home automation and real-time location sharing, with a healthy dose of head-scratching and eventual triumph.

My latest tinkering has a distinctly familial focus, and this time it’s going to be a visually striking addition to the home! I’m currently wrestling with the exciting challenge of building a custom family tracker LED display that will eventually grace our wall. This meant diving headfirst into getting a Raspberry Pi 5 to play nicely with Node-RED, MQTT, and OwnTracks. The goal is to create a vibrant, at-a-glance representation of where everyone is.

Why Node-RED, Mosquitto, No-IP and OwnTracks?
For those new to these tools, here’s a quick rundown of what each piece of the puzzle does:
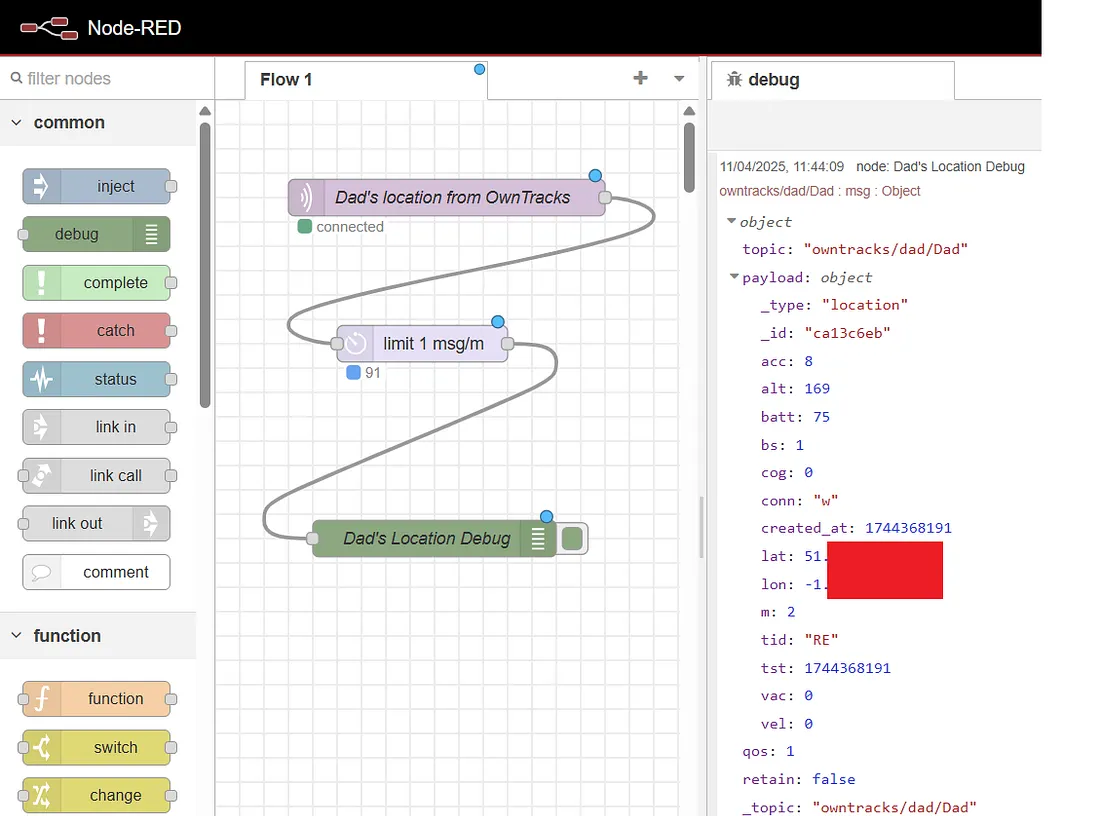
A visual, flow-based programming tool. Think “drag-and-drop” for connecting hardware, APIs, and online services. I planned to use it to visualise and process the incoming location data.
A lightweight “message broker” that uses the MQTT protocol. A central hub for devices and mobile phones to send and receive real-time location telemetry efficiently.
Gives your home Raspberry Pi a stable hostname (like my-pi.ddns.net), even when your home ISP address changes. Essential for external connections.
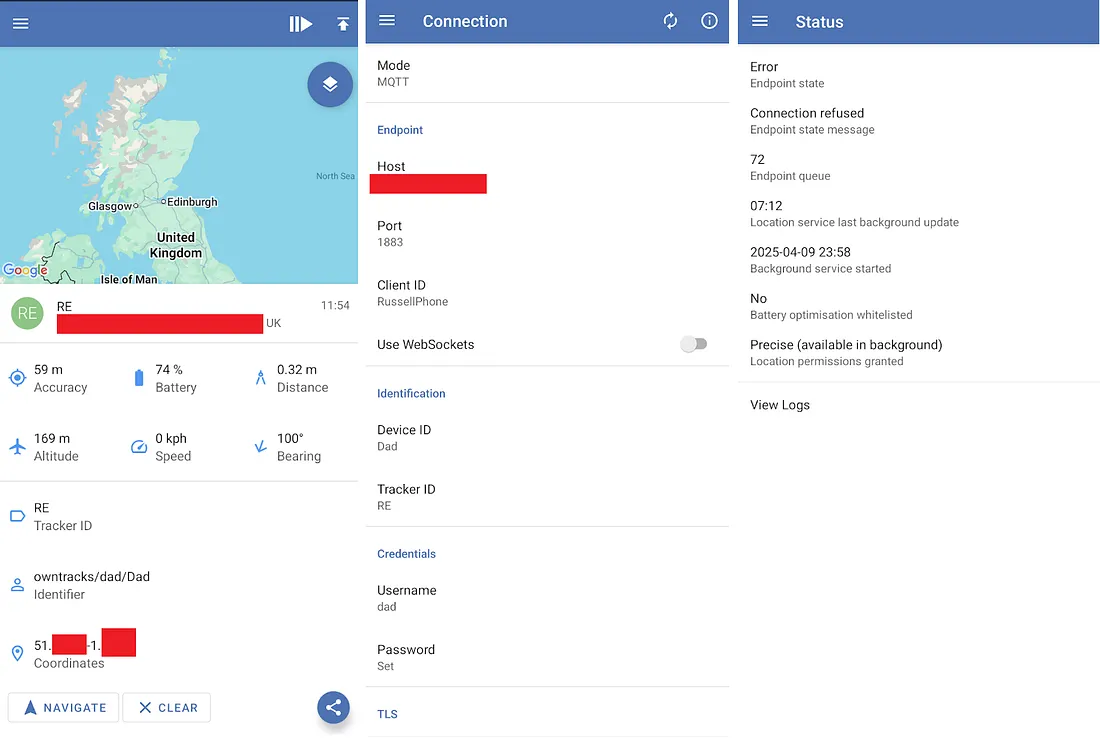
An open-source mobile app (iOS and Android) that securely publishes your phone’s live GPS coordinates directly over MQTT to Mosquitto.
Prerequisites
Before you dive in, you’ll need:
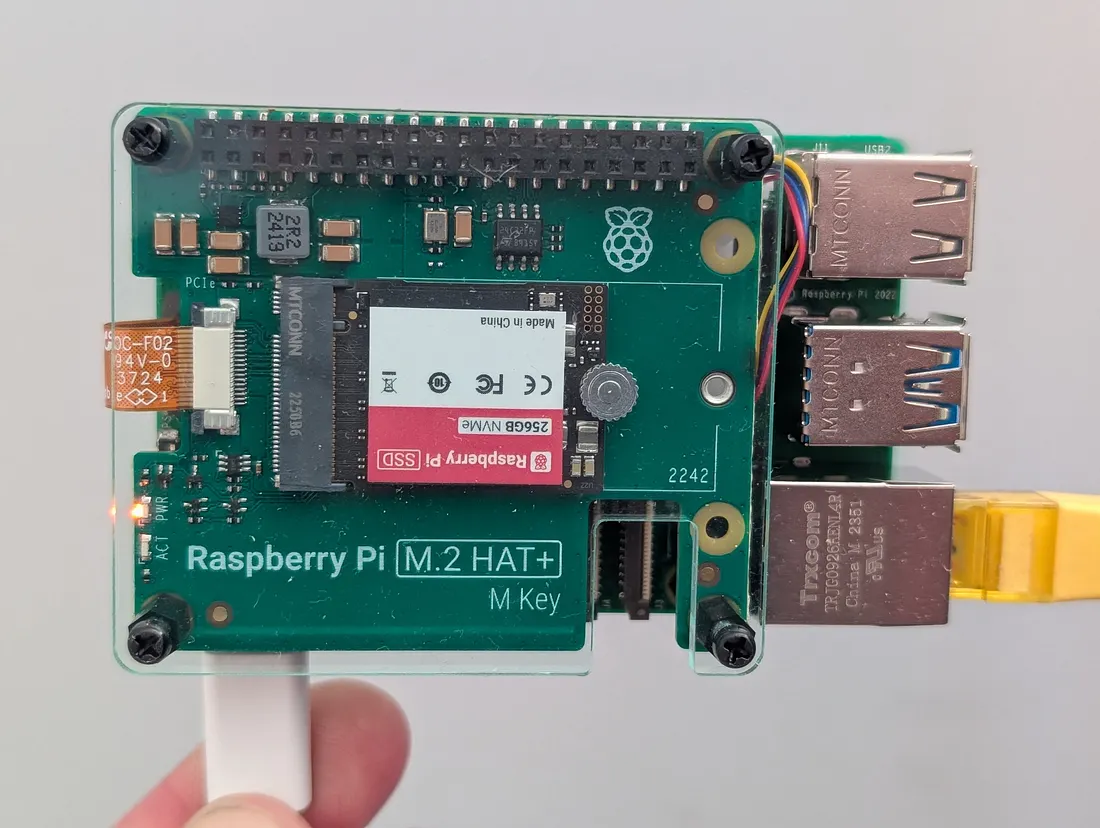
- A Raspberry Pi 5 (or similar model).
- Raspberry Pi OS (the latest stable 64-bit version is best).
- A reliable internet connection with router admin access for port forwarding.
- A bit of familiarity with the Linux command line (don’t worry, I’ll guide you!).
- The OwnTracks app installed on each phone you want to track.
Installing the Core Components
Installing Node-RED
I started with Node-RED, eager to get my location visualisation flows up and running. I found a command online that looked promising:
1bash <(curl -sL https://raw.githubusercontent.com/node-red/linux-install/master/deb_pi.sh)But, alas, I was greeted with this:
1/dev/fd/63: line 1: 404:: command not foundA bit of digging revealed that the installation script’s URL had changed. Always a good reminder to check the official Node-RED documentation! The correct way to install Node-RED on Raspberry Pi OS is globally via npm:
1sudo npm install -g --unsafe-perm node-redThis command uses npm which comes with Node.js, installing Node-RED globally. The --unsafe-perm flag allows npm to run package scripts with elevated privileges when necessary.
Adding User Authentication to Node-RED
To secure your Node-RED web editor with a username and password, you modify the settings.js configuration file:
- Stop Node-RED:terminal1node-red-stop
- Open the settings file in nano:terminal1sudo nano ~/.node-red/settings.js
- Find the httpAdminAuth section: Scroll through until you locate the commented-out section:~/.node-red/settings.js1// When enabled, you will be asked for this username and password when2// you access the Node-RED editor.3// httpAdminAuth: {4// user: "admin",5// pass: "password"6// },
- Uncomment and set your initial credentials:~/.node-red/settings.js1httpAdminAuth: {2 user: "my_secure_username",3 pass: "my_very_strong_password"4},
Important: This password is plain text initially. In the next step, Node-RED will hash it for production security.
- Save changes: Press
Ctrl+X, thenY, thenEnter. - Start Node-RED in verbose mode:terminal1node-red -v
- Access the editor: Navigate to
http://<your_pi_ip>:1880/in your browser and enter your credentials. - Copy the hashed password: Look at the terminal output for the string starting with
Password hash:. Copy that long hash. - Stop Node-RED: Press
Ctrl+C. - Update settings.js with the hash:~/.node-red/settings.js1httpAdminAuth: {2 user: "my_secure_username",3 pass: "the_long_hashed_password_string_you_copied"4},
- Save and start Node-RED:terminal1node-red-start
Key Node-RED Commands
Installing Mosquitto (The MQTT Broker)
Next up was Mosquitto, the crucial component for OwnTracks to communicate. Thankfully, the basic installation was straightforward:
1sudo apt update2sudo apt install mosquitto mosquitto-clients3sudo systemctl start mosquitto4sudo systemctl enable mosquittoTesting Mosquitto Locally
To confirm Mosquitto is operational, test pub/sub in two terminal sessions:
1mosquitto_sub -v -t "test/topic" -u "your_username" -P "your_password"1mosquitto_pub -t "test/topic" -m "Hello from Raspberry Pi!" -u "your_username" -P "your_password"If working properly, the message appears immediately in Terminal 1, proving the broker is routing topics across clients.
Installing and Configuring No-IP (Dynamic DNS for Remote Access)
No-IP was essential to allow my family’s OwnTracks apps to connect to my Mosquitto broker from outside my home network.
First, sign up for a free account at No-IP.com and register a free hostname (e.g., my-pi.ddns.net). Then on the Pi:
1cd /usr/local/src/2sudo wget http://www.no-ip.com/client/linux/noip-duc-linux.tar.gz3sudo tar xf noip-duc-linux.tar.gz4cd noip-2.1.9-1/ # Adjust this directory name if it differs5sudo make installTo run the Dynamic DNS client automatically on boot, create a systemd unit file:
1[Unit]2Description=No-IP Dynamic DNS Client3After=network.target4
5[Service]6User=root7WorkingDirectory=/usr/local/src/noip-2.1.9-1/8ExecStart=/usr/local/bin/noip29Restart=on-failure10
11[Install]12WantedBy=multi-user.target1sudo systemctl enable noip.service2sudo systemctl start noip.service3sudo systemctl status noip.service # Confirm statusSetting Up OwnTracks for Family Location Sharing
Now for the core of the project: configuring Mosquitto to authenticate each family member’s phone independently.
Create Mosquitto Users (One Per Phone)
Use -c for the first user only (to create the file), and -b for subsequent users so they are appended without overwriting:
1# First user (creates password file):2sudo mosquitto_passwd -c /etc/mosquitto/passwd dad3
4# Subsequent users (appends without overwriting):5sudo mosquitto_passwd -b /etc/mosquitto/passwd mum mum_password6sudo mosquitto_passwd -b /etc/mosquitto/passwd child child_password
Then edit /etc/mosquitto/mosquitto.conf and add these security directives at the bottom:
1allow_anonymous false2password_file /etc/mosquitto/passwd1sudo systemctl restart mosquitto.serviceRouter Port Forwarding
You must forward external port 1883 on your home broadband router to the local internal IP address of your Raspberry Pi. This enables phones roaming on 4G/5G mobile networks to reach the broker.
Configuring the OwnTracks App on Each Phone
- Install OwnTracks: From the iOS App Store or Google Play Store.
- Select MQTT Mode: Choose “MQTT” (or “Private MQTT”). Do NOT select HTTP.
- Enter Broker Details:
- Host: Your No-IP hostname (e.g.,
yourpi.ddns.net). - Port:
1883 - Username: The username you created in Mosquitto (e.g.,
dad). - Password: The corresponding user password.
- Client ID: Unique per device (e.g.,
dad-phone). - Tracker ID: 2-character or short person identifier (e.g.,
da). - TLS: Disabled for initial setup.
- Host: Your No-IP hostname (e.g.,
- Connection Tuning: Adjust Desired Accuracy and Distance Filter to strike the ideal balance between location granularity and phone battery life.
Troubleshooting: Lessons from the Frontlines
This is where the real learning (and frustration) began. I encountered a series of errors that tested my patience and problem-solving skills.
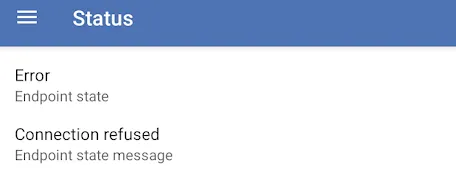
1. Mosquitto Authentication Puzzle: “Connection Refused: not authorised”
After setting up credentials, OwnTracks failed to connect, throwing “Connection Refused: not authorised” errors even though I was certain the passwords matched:
The Investigation:
- Verified Mosquitto was running:
sudo systemctl status mosquitto.service. - Fixed file permissions:terminal1sudo chown mosquitto:mosquitto /etc/mosquitto/passwd2sudo chmod 640 /etc/mosquitto/passwd
- Discovered I had accidentally overwritten earlier users by using
mosquitto_passwd -crepeatedly! - The Root Cause: In modern versions of Mosquitto, the broker defaults to listening only on the localhost loopback (127.0.0.1). It was silently rejecting external connections!
/etc/mosquitto/mosquitto.conf:1listener 18832. No-IP Service Startup Failure (CHDIR Error)
The No-IP systemd service failed with a cryptic log entry:
1Failed at step CHDIR spawning /usr/local/bin/noip2: No such file or directoryChatGPT pointed out that the WorkingDirectory in the service file was pointing to the temporary build folder rather than the binary location.
WorkingDirectory=/usr/local/src/noip-2.1.9-1/ to:1WorkingDirectory=/usr/local/binSecurity Recap: Best Practices
sudo tail -f /var/log/mosquitto/mosquitto.log handy to verify connection attempts.Setting up a home automation system and a real-time family location map with OwnTracks is a deeply rewarding endeavour. Yes, there were hurdles along the way, but with patience and a little debugging, you can build something truly personalized for your household.
If you’d like to see how my Raspberry Pi family tracker wall display develops into its final LED form, follow along on YouTube . Happy tinkering!